
This article is part four of a five-part series designed to demonstrate to Bitcoin beginners how to install, secure and use a Bitcoin wallet. This part of the series covers installing Sparrow Wallet on a desktop computer.
Find part one of the series here, part two here, part three here and part five here.
If you have a desktop computer, then I highly recommend using Sparrow Wallet. This article will walk you through the basic steps for installing, securing and using Sparrow Wallet on desktop. Sparrow is meant to connect to your own Bitcoin node, if you don’t have a node setup already then check out this guide by @BitcoinQ_A and also this guide is a great resource for Sparrow Wallet. Before getting started, it is a good idea to have a pen and paper ready. Remember to start with small amounts of bitcoin until these concepts make more sense and you are comfortable putting your funds in a mobile wallet. And always backup your seed phrase!
Step One: Install Sparrow Wallet
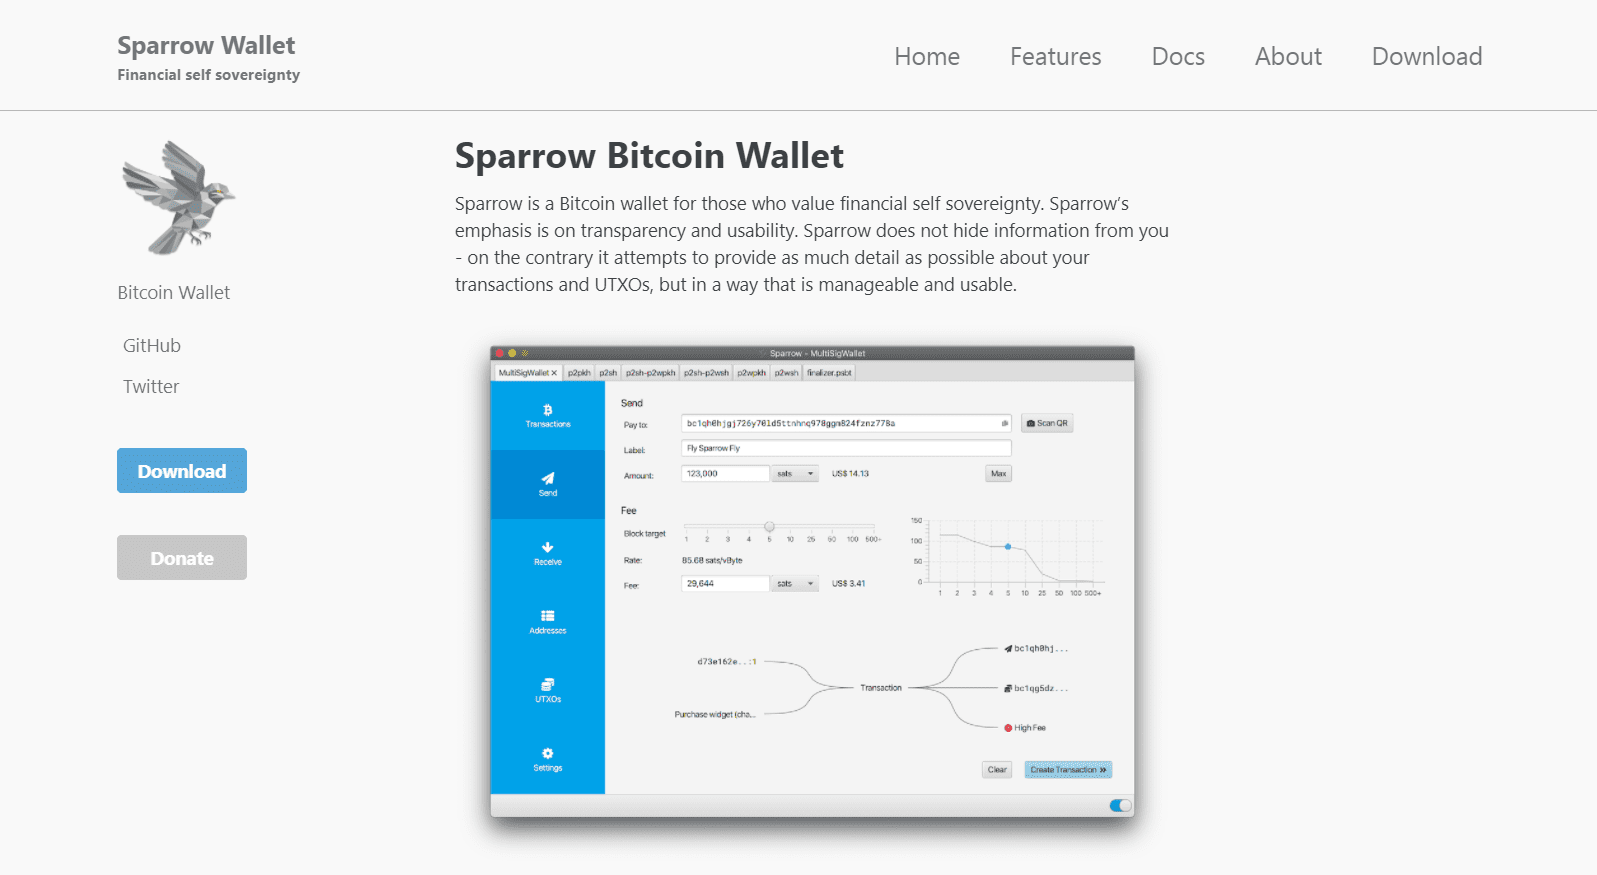
Sparrow wallet is a desktop software application that is designed to be used with your own Bitcoin full node. In this example, I connected it to my Raspberry Pi Bitcoin full node running Bitcoin Core. Sparrow Wallet can be downloaded from: https://sparrowwallet.com/
It’s good practice to verify any software that you download. I used Kleopatra. Verifying PGP signatures goes beyond the scope of this article, but it is a way that you can verify that you are downloading the purported software. For good software verification guides, check here and here for the basic concepts.
The TL;DR is: import the developers’ public key. Download the signed hash value. Verify the signature. Calculate the hash value on the executable file. And compare the checksums. When finished you should have a verified confirmation like this:
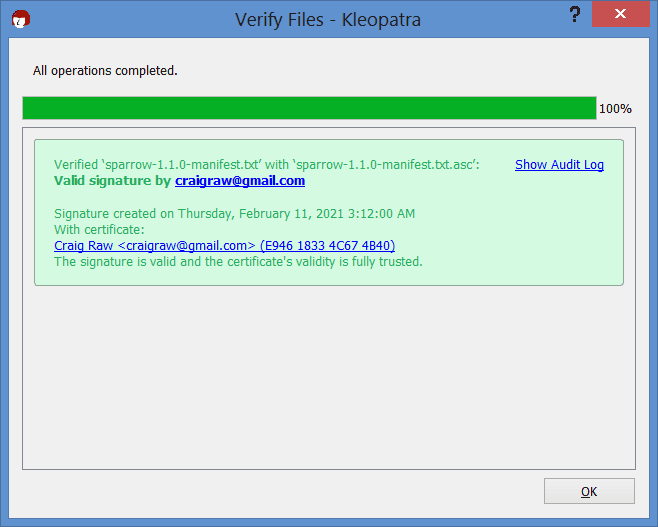
Now, I know that the hash values contained in the signed file are valid. Then I can compare those hash values to the .exe file I downloaded. If the signed hash value matches mine, then I can run the executable file in confidence.
d192d2199ef412aa9fbeb8c088b3167e5504315c0c3b3e0d563b581c4b1a21d4 *Sparrow-1.1.0.dmg
16105c0211aaa48035e9252d83f535b43056beb5f9af81e1735ceb2611b167ae *Sparrow-1.1.0.exe
29aa7cde1bfeac94e5c36f22282d0df25cbb5298df6d54375cca71fa9d76d726 *Sparrow-1.1.0.zip
d8d38626a47043d29e838472ad4a9721d3234f071fab7a8a3d3818a916f069f4 *sparrow-1.1.0-1.x86_64.rpm
1951239513265ec97556e63e5f320fb5bdfcdb37ac3803e5ce466f9e3b08d005 *sparrow-1.1.0.tar.gz
76f138e2bdda6511d1435a77352f215b313604703ff7e06739f81eb0984f71bf *sparrow_1.1.0-1_amd64.deb
Step Two: Configuration
Once installed, toggle to offline mode and select “Configure Server.”
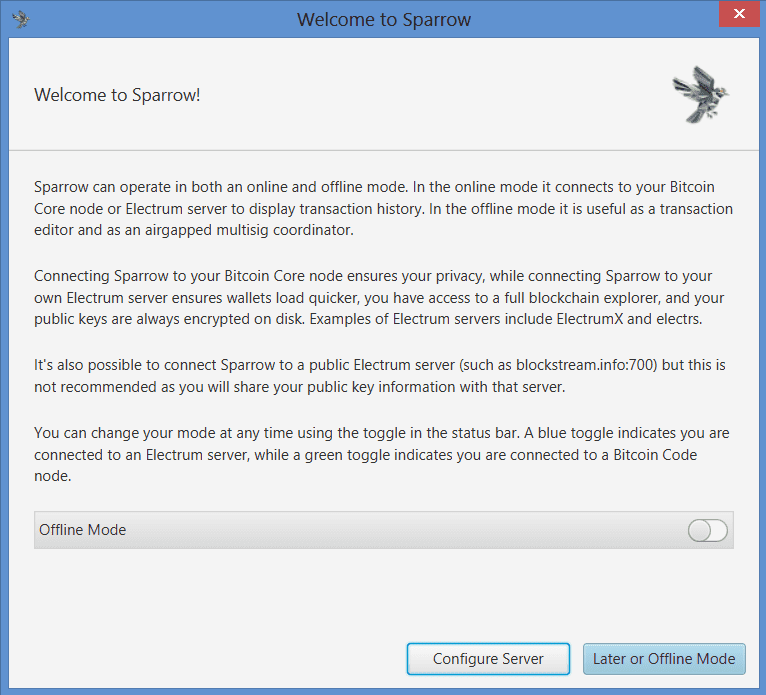
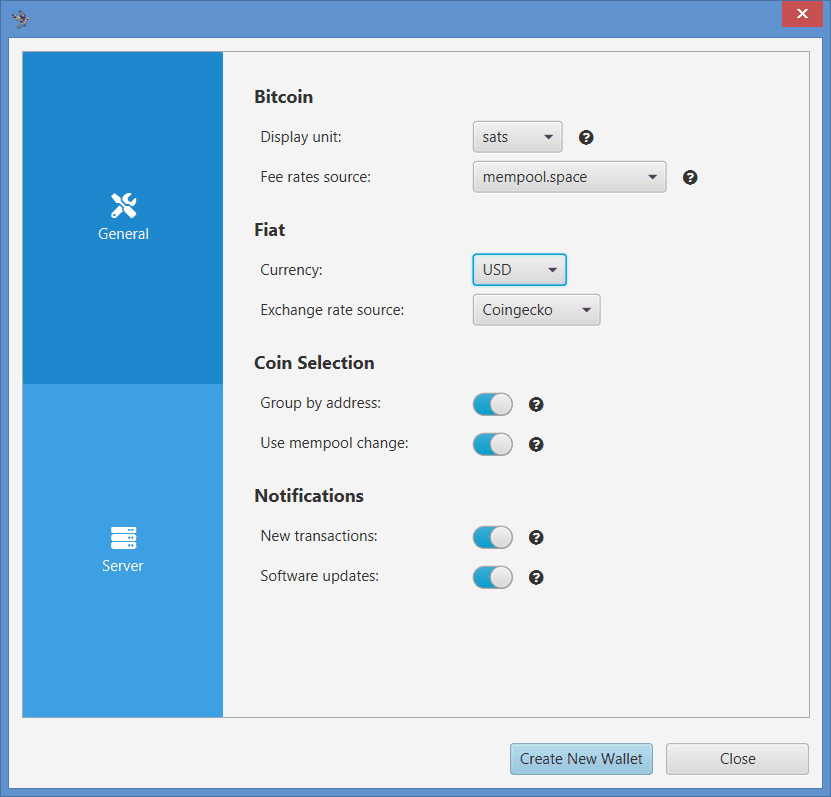
Next, you can configure the general settings like bitcoin unit, preferred fiat currency, coin selection and notifications.
Then in the server settings section, you will want to enter your Bitcoin node’s local IP address and username/password.
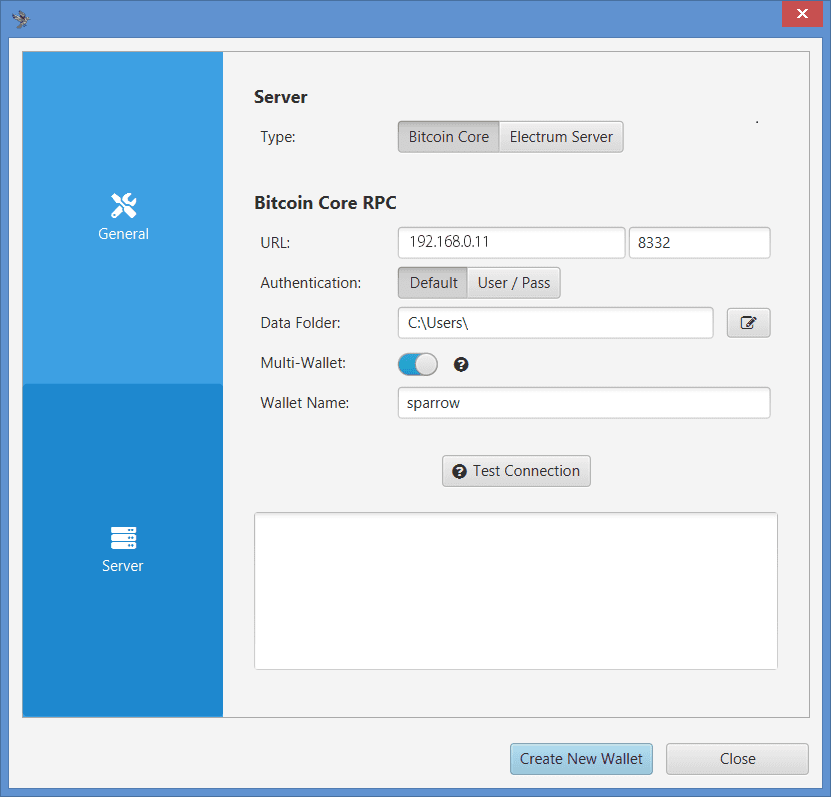
If you haven’t done so already, this information first needs to be set up in your Bitcoin.conf file, which is typically accessible by running the following command from the same folder in which you have Bitcoin installed, in the terminal on your Raspberry Pi:
sudo nano bitcoin.conf
Once in your bitcoin.conf file, make sure you take the hashtag (#) off of your rpcuser and rpcpassword. Set them accordingly however you want.
You should be able to find your Raspberry Pi local network IP address by logging into your router. Then, make sure you have your local IP address notated so that you can enter the following information in the bitcoin.conf file:
rpcbind=127.0.0.1
rpcbind=192.168.0.11 (your node)
rpcallowip=127.0.0.1
Rpcallowip=192.168.0.12 (desktop)
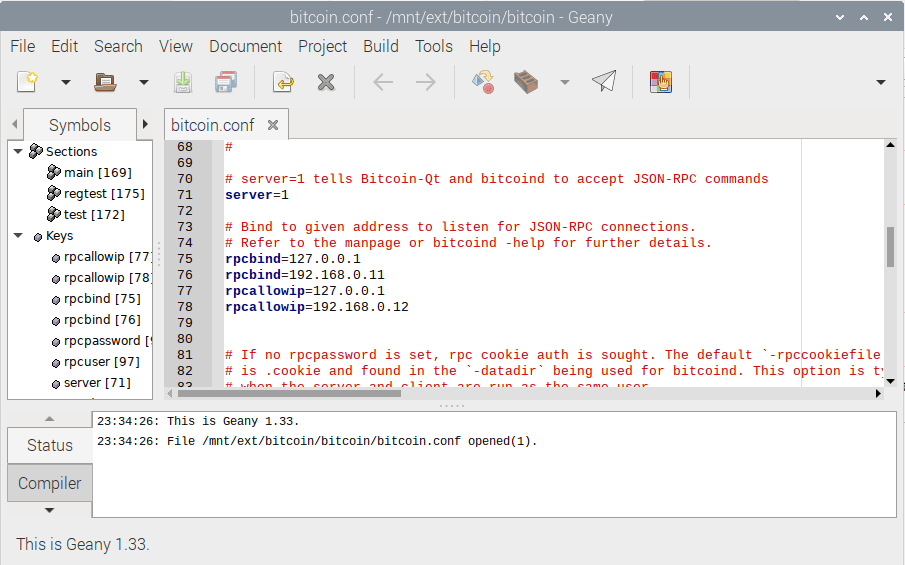
After editing your bitcoin.conf file, save your changes, then you will need to restart Bitcoin.
Then, once it is back up and running, use the same rpcbind IP address as the URL with 8332 as the port. And use the same User/Pass that you entered in the bitcoin.conf file. Test the network connection from Sparrow Wallet. If it’s good, you should see the green check mark next to “Test Connection” and some information populated in the dialog box below that. Then select “Create New Wallet.”
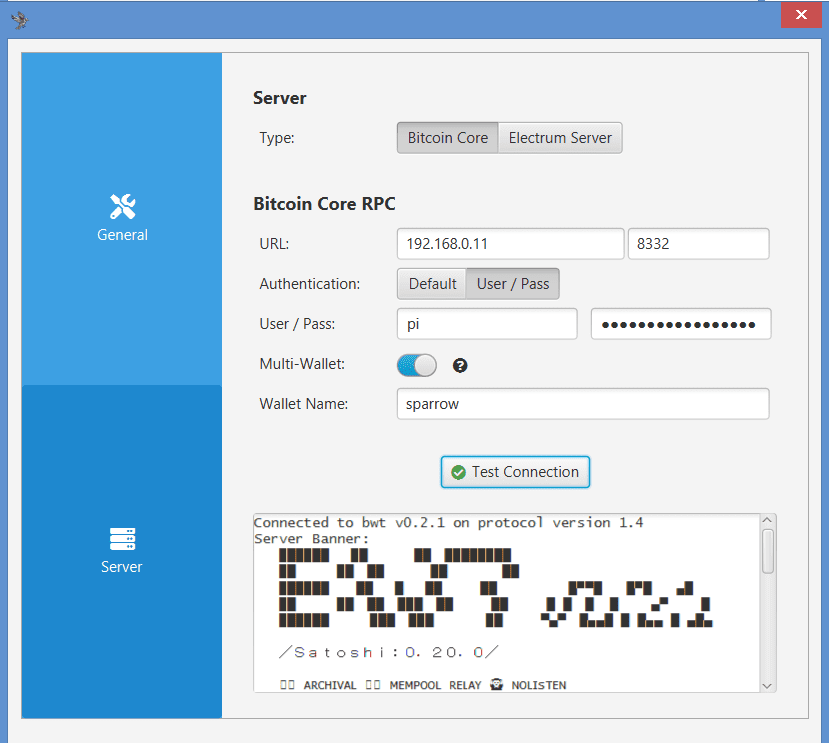
If you get an error, you’ll have to shut down Bitcoin, edit the configuration file, start Bitcoin and try testing again. It took me a few tries to get everything correct because I’m not very good at network configurations.
More details can be found on Sparrow Wallet’s website here.
Step Three: Wallet Setup
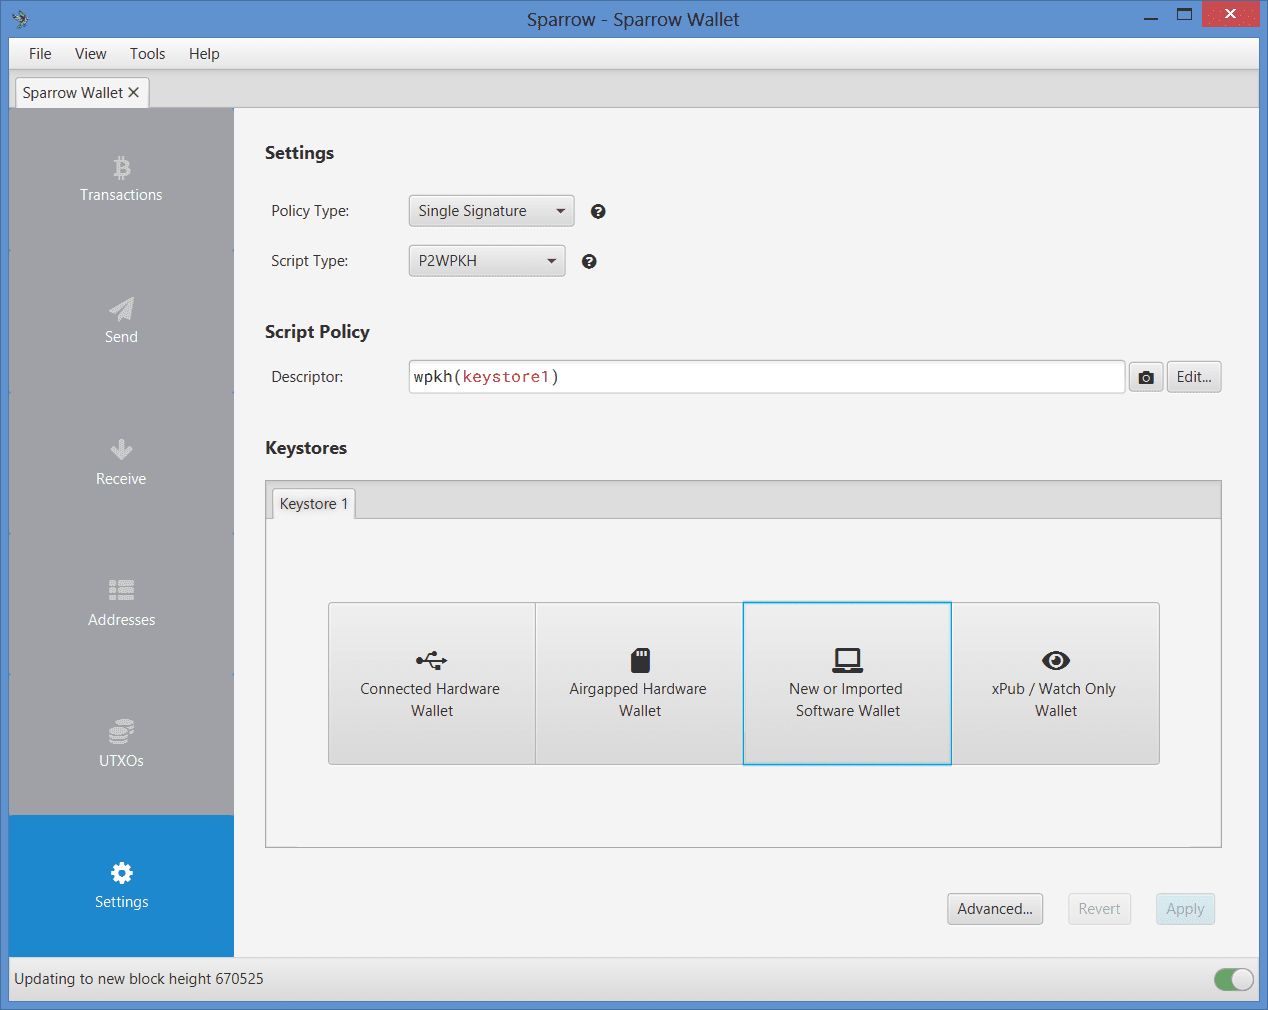
Sparrow Wallet has several wallet configuration options available. You can use Sparrow Wallet to connect a hardware wallet, an air-gapped wallet and a watch-only wallet. You can choose different script types if you want legacy addresses that start with “1” or nested-SegWit addresses that start with “3.” You can also set up multi-signature policy types. There are a lot of options.
To make a new single signature P2WPKH (Native SegWit) wallet — addresses that start with “bc1” — select “New or Imported Software Wallet.”
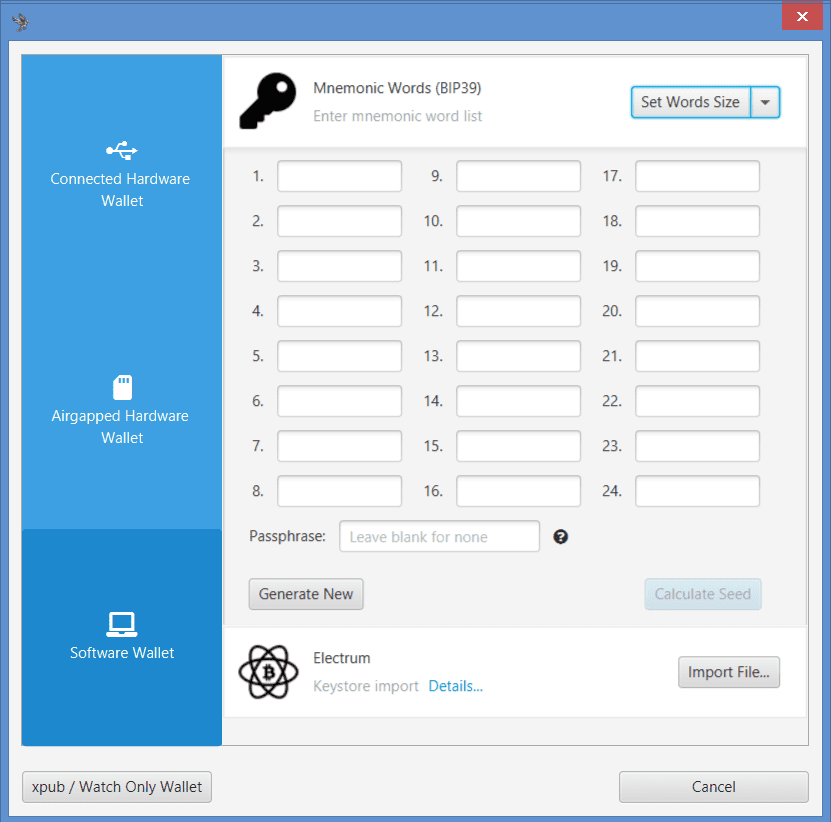
On the next screen, you can select how many words you want in your seed phrase. I recommend just sticking with 24 seed words.
Then, select “Generate New.”
Step Four: Secure Your Seed Phrase
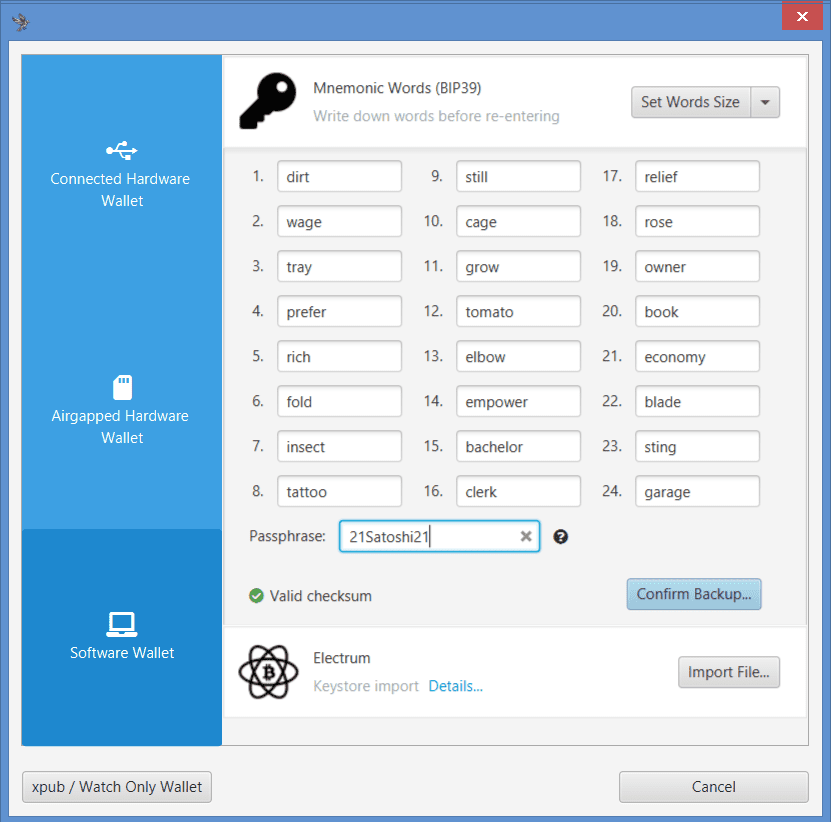
Sparrow Wallet will generate your 24-words and then you can add a passphrase.
I recommend using a strong, high-entropy passphrase that cannot be guessed easily like this one. Others may suggest using a passphrase that can be easily memorized. Weigh the tradeoffs for yourself and do what is best for you. Whatever you choose, remember that this passphrase will be necessary to recover your wallet in the event that your desktop is lost, damaged or replaced.
Note: This is the most important step.
- Write down your words in order on a piece of paper
- Secure this piece of paper as if it were gold or jewelry
- Do not screenshot these words
- Do not save these words in a computer or on your phone
- Do not say these words out loud
- Never share these words with anyone for any reason
- Your bitcoin is only as secure as your 12 words and passphrase.
- Double check your work
- You will also need your passphrase from above for a complete secure backup.
Then, select “Confirm Backup” and then you will be asked to re-enter all of your words and passphrase to verify that you wrote them down.
You will need all of your seed words in the correct order and your passphrase to restore your wallet.
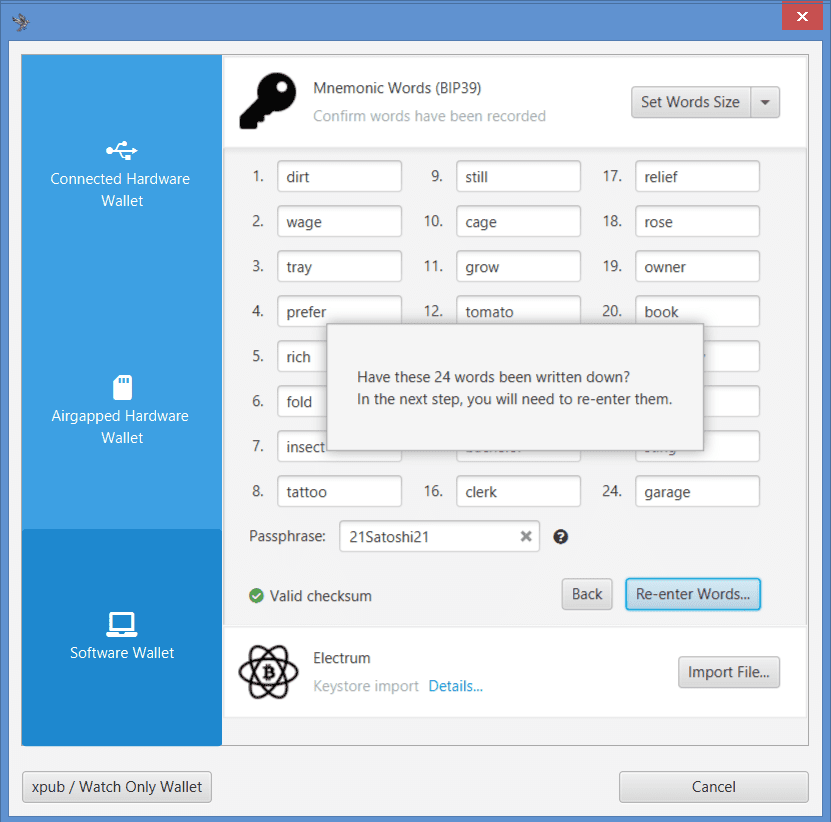
Note: Once you get more serious about Bitcoin, consider securing your seed phrases in metal instead of on paper.
Step Five: Finalize
On the next screen, you will be asked if you want to use the default derivation path. I recommend leaving the derivation path as the standard m/84’/0’/0’.
Then, select “Import Keystore.”
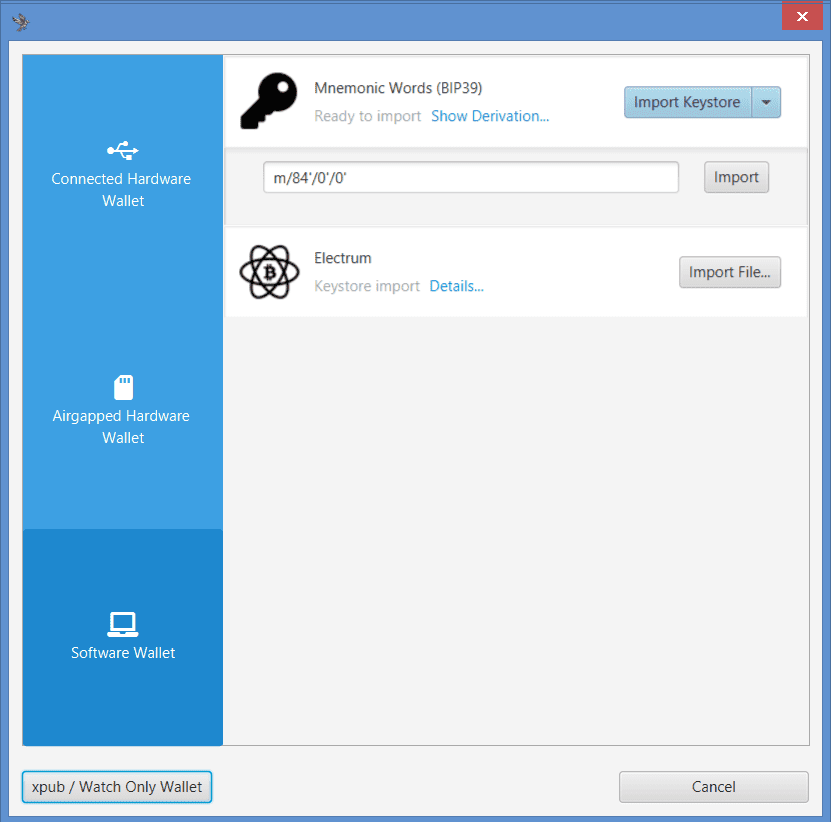
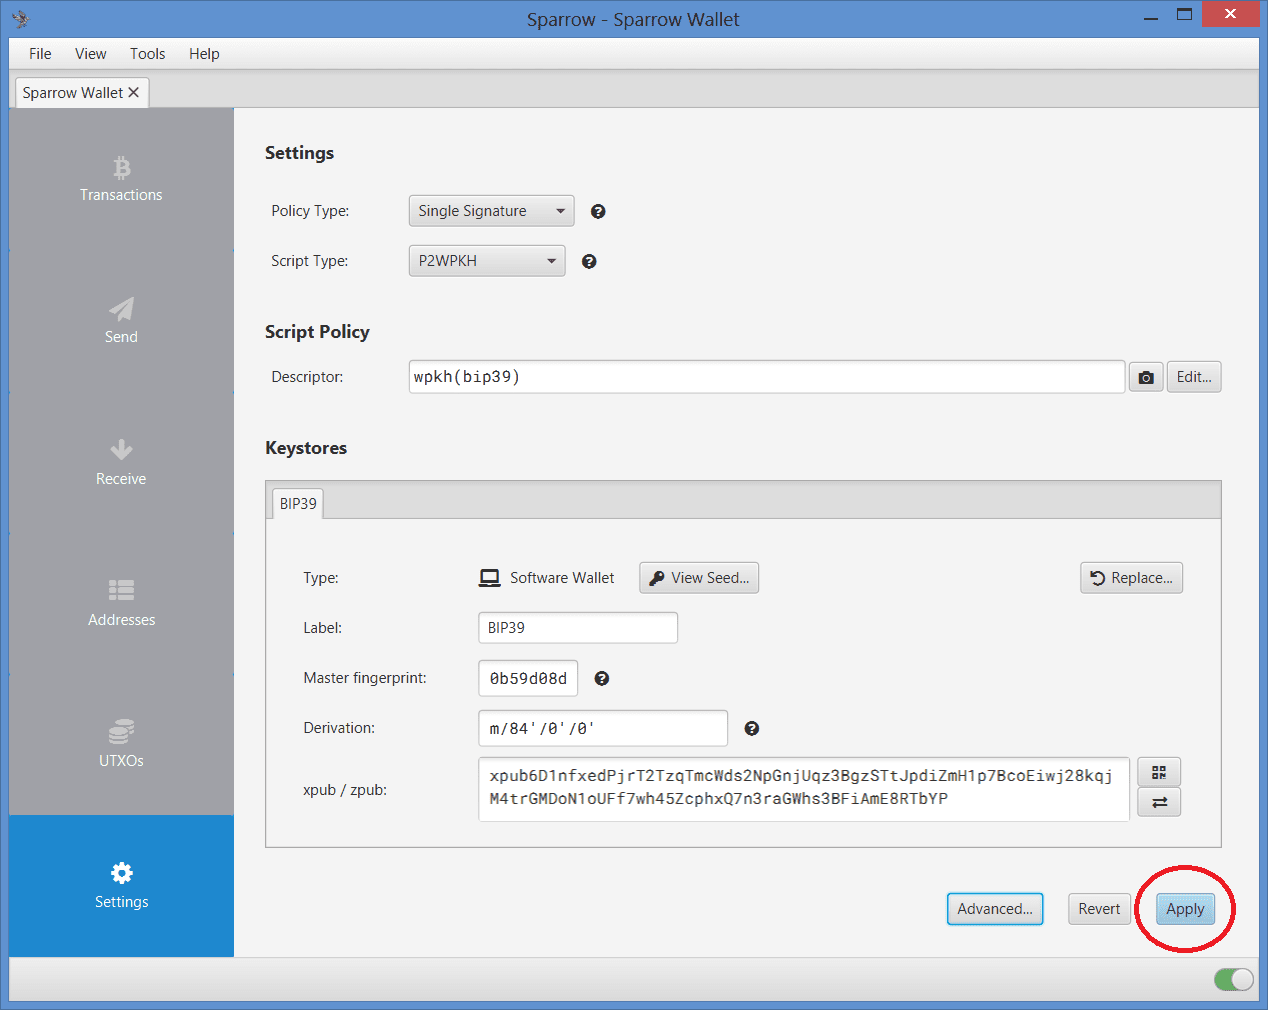
After the import is complete, make note of the master fingerprint. This is how you can confirm that you have restored the correct wallet in the future. This fingerprint is unique to your wallet accessed by your 24 words and passphrase.
Then, select “Apply.”
You will also be asked to name your wallet and set an optional wallet password. The password is what encrypts your wallet file on your computer. This is different than your passphrase, which acts as a “twenty-fifth word” for your wallet seed phrase.
Your node will automatically scan your new wallet to see if you have any funds. Once your node is done scanning your new wallet, you can start generating receive addresses and get some bitcoin.
Step Six: Receive Bitcoin
Wait until your node is finished scanning. Then by navigating to the “Receive” tab, you can select the “Get Next Address” button to generate your first receiving address. Now you can scan your QR code with your mobile wallet or copy/paste the address and send it to someone for payment. Sparrow Wallet displays additional information about your address like the derivation path, the script and the descriptor.
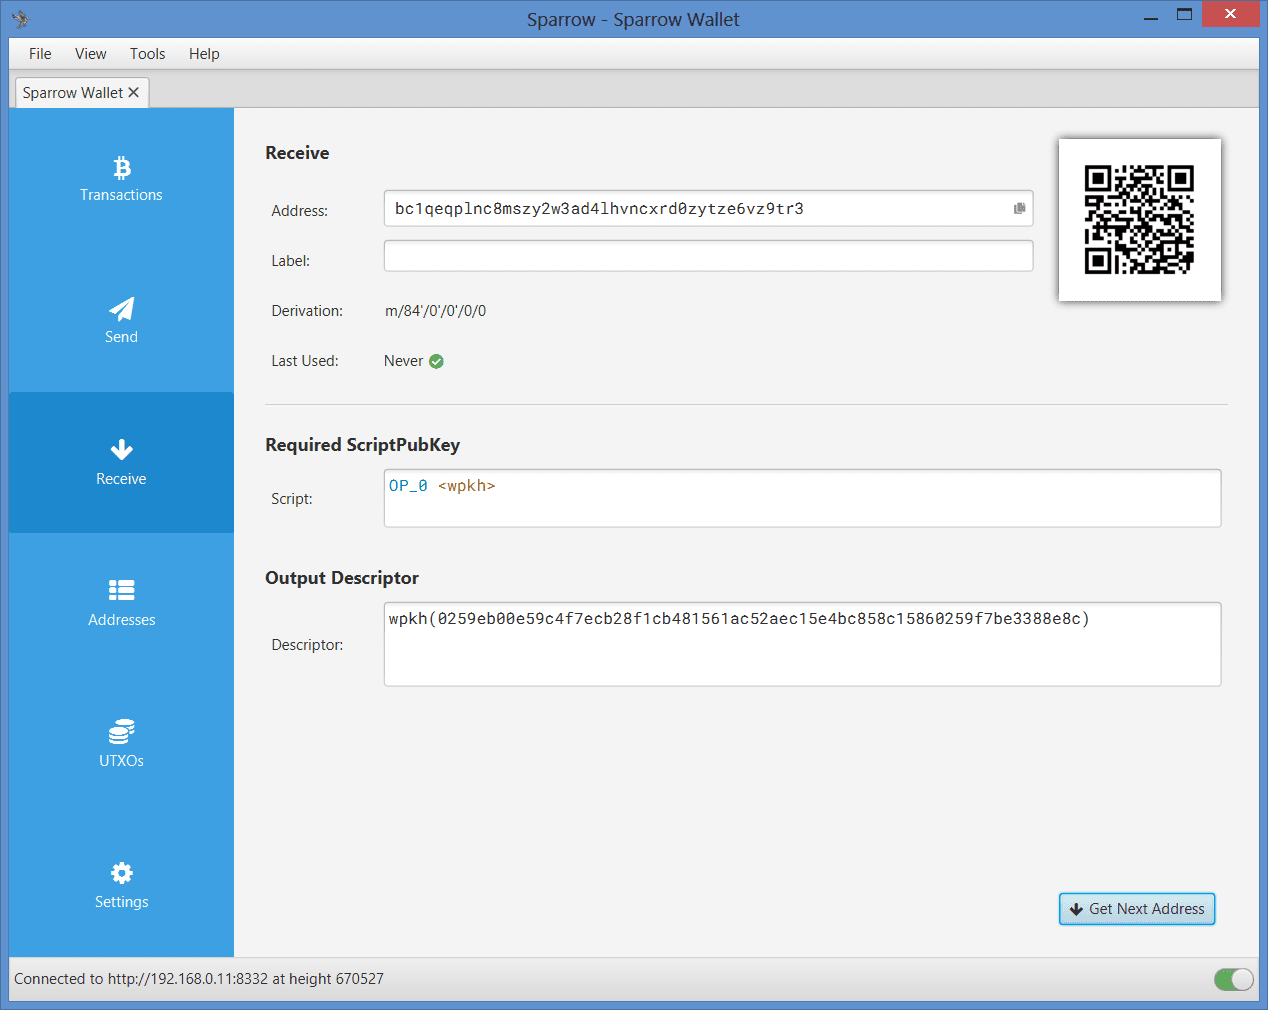
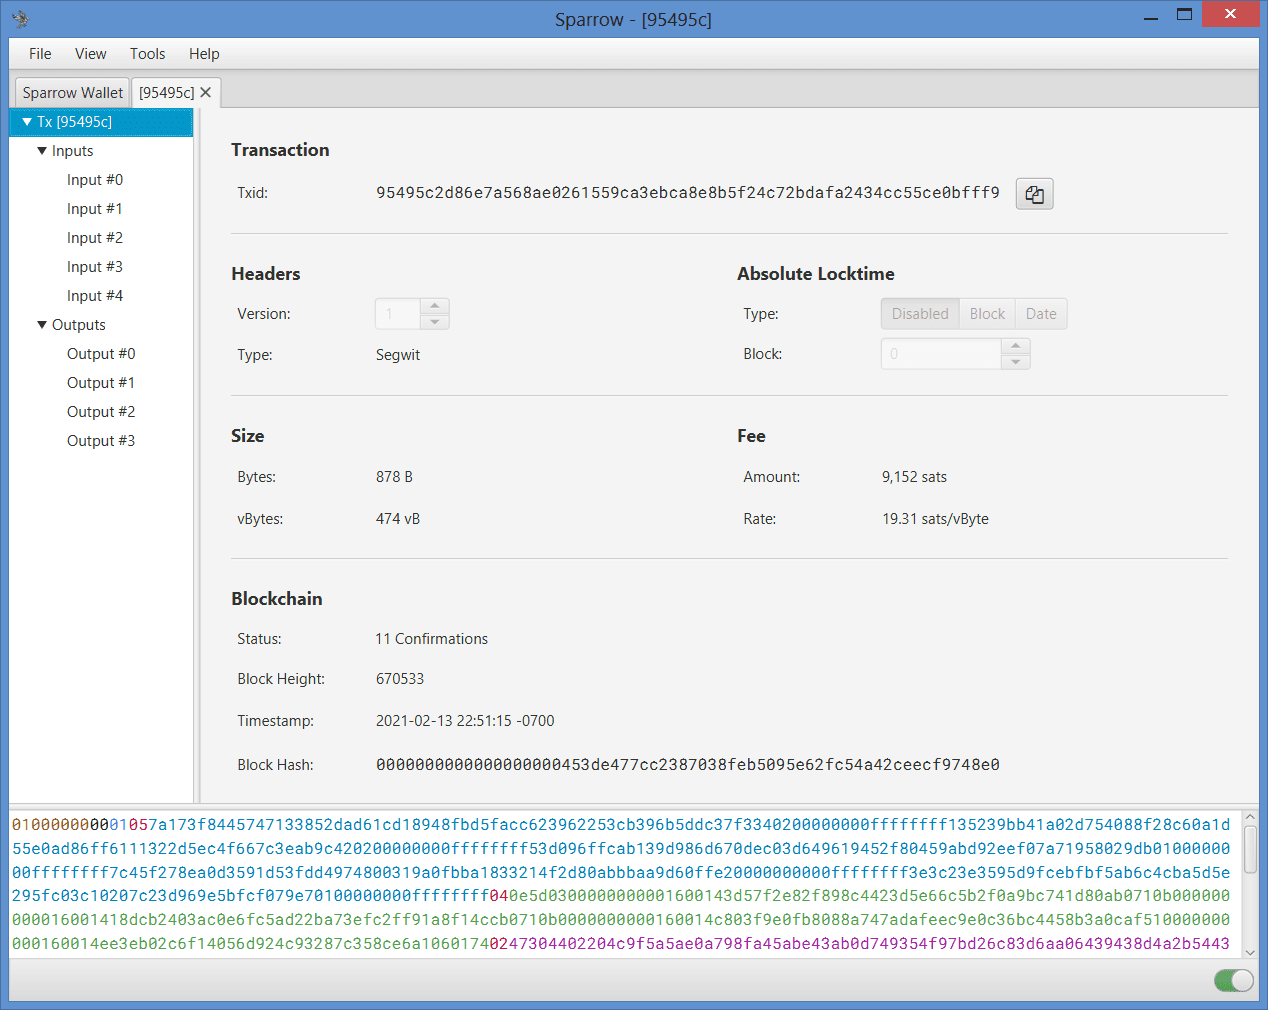
I sent some bitcoin from one of the mobile wallets generated in the previous guides. Once your receipt is confirmed, you can see all kinds of details about your transaction.
Sparrow is like its own block explorer using your node.
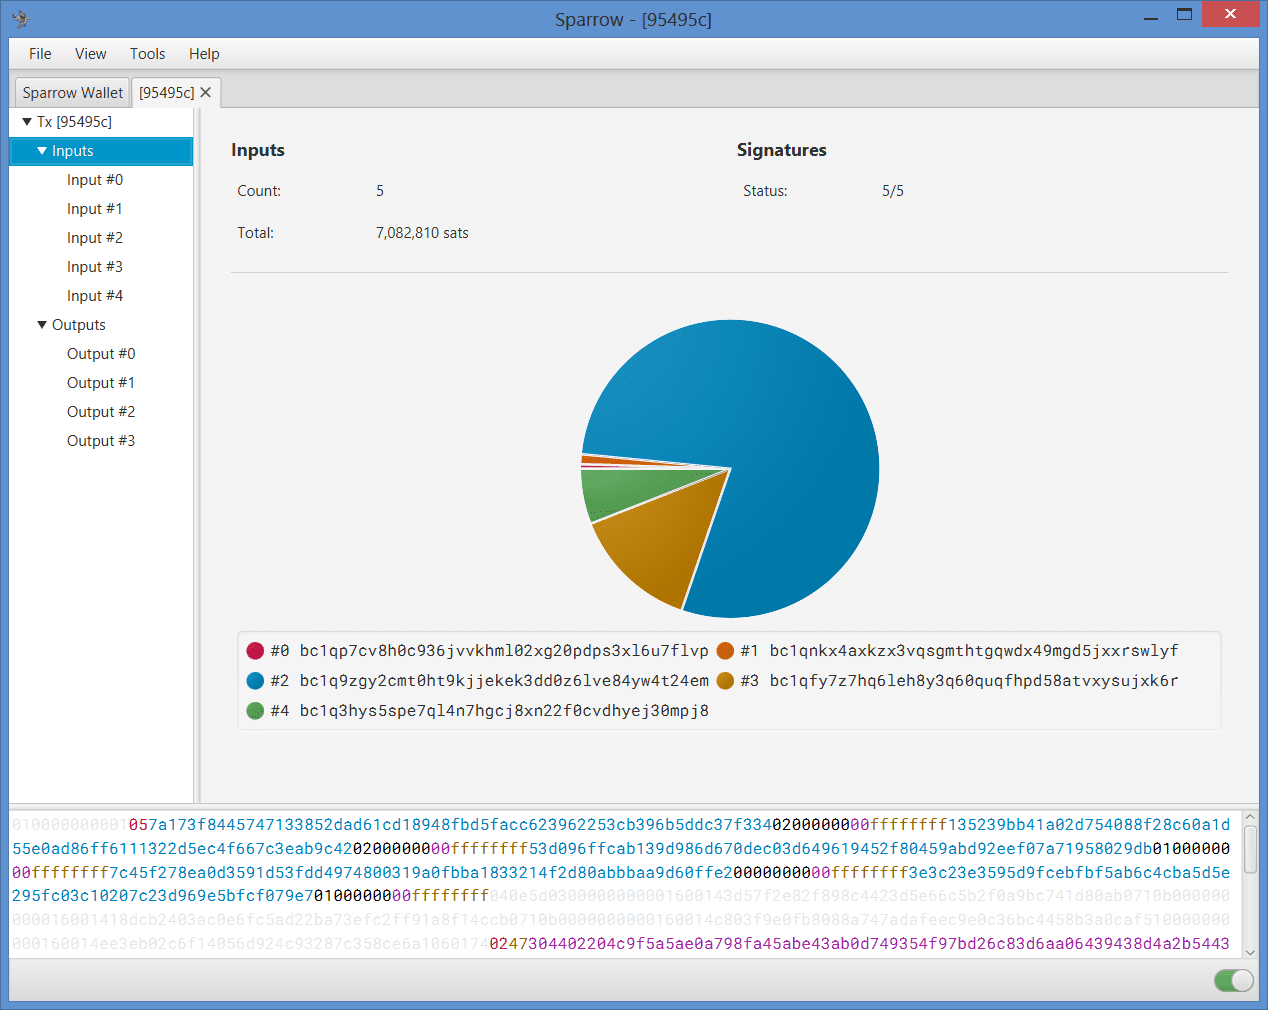
You can also explore the inputs in further detail:
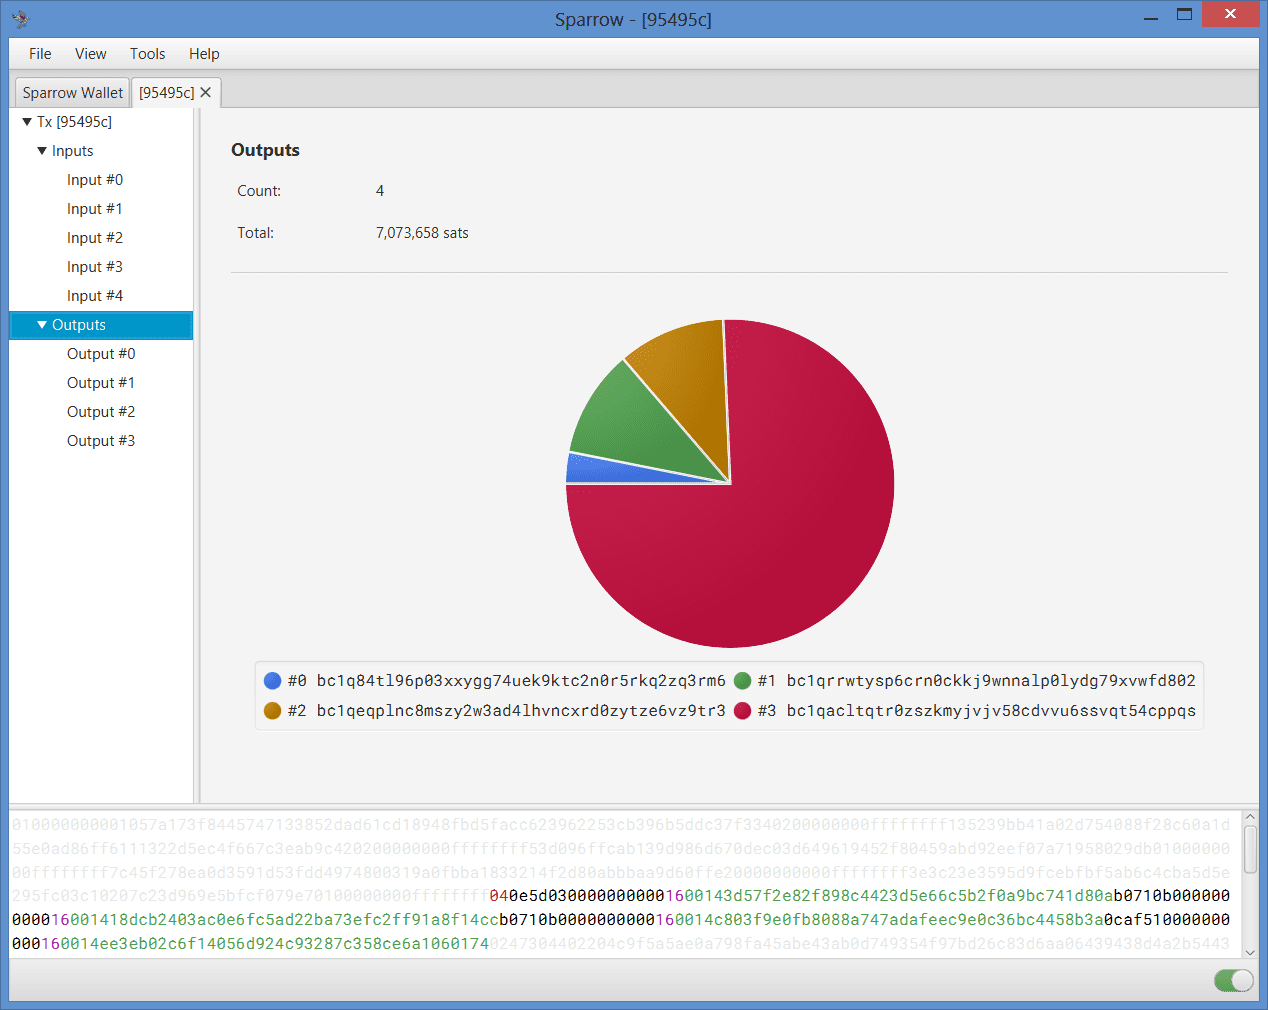
You can also explore the outputs in further detail:
Step Seven: Send Bitcoin
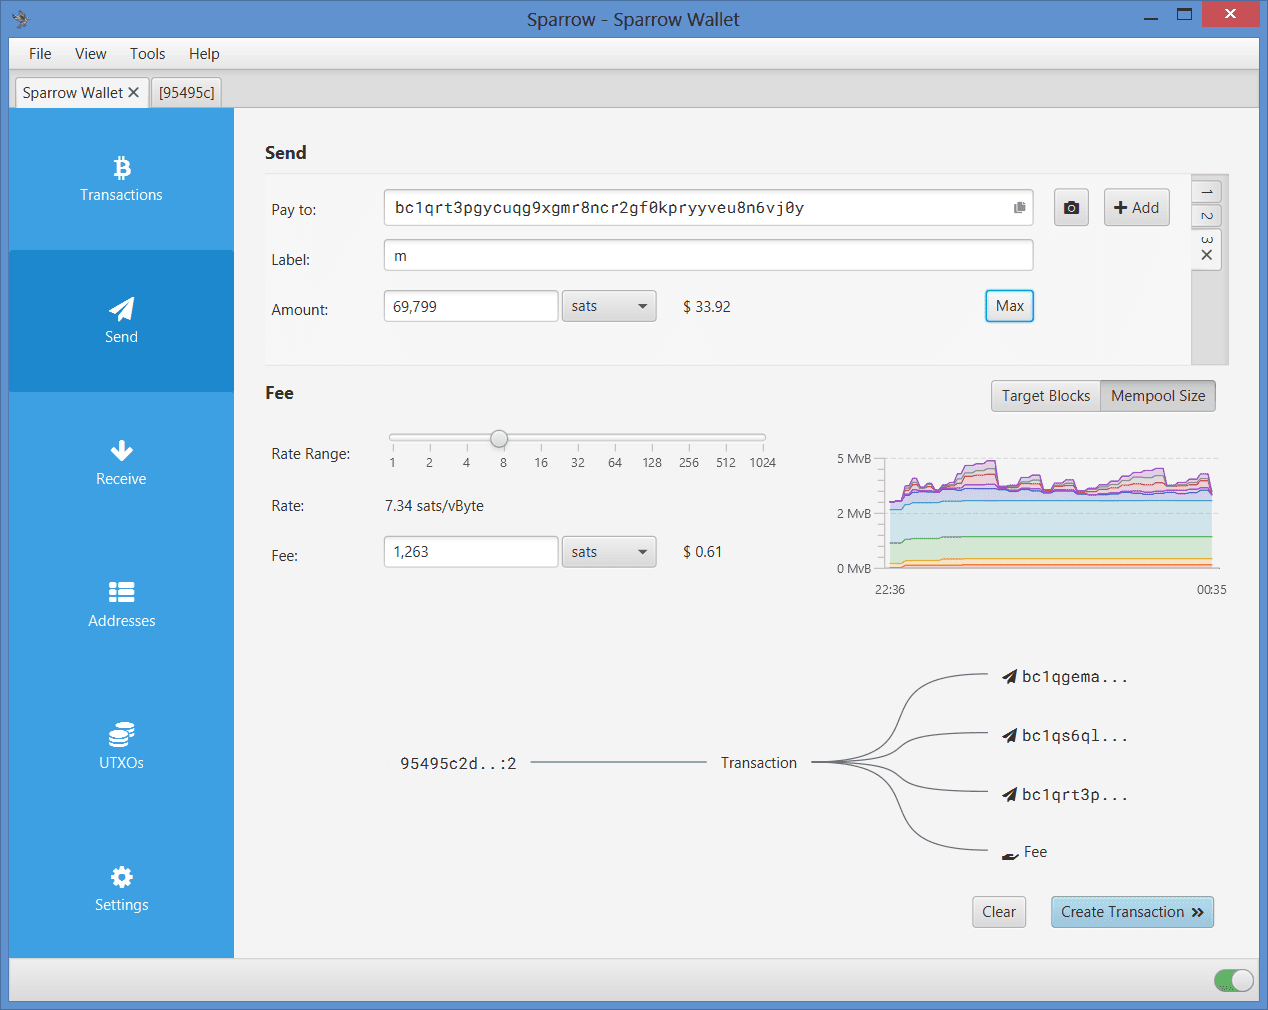
Once you’re ready to spend, navigate to the “Send” tab. There, you can add several receivers in the same transaction by either copy/pasting the receiver’s Bitcoin address or by activating your computer’s camera to scan a Bitcoin address QR code.
You can add a label if you like, enter the amount you wish to spend and you can easily slide the miners fee to where you want it.
Sparrow Wallet maps out a little graph with the mempool.space data as well to help you estimate how fast your transaction will be included in the blockchain. There is a little transaction connection graph displayed as well.
Once everything looks good, select “Create Transaction.”
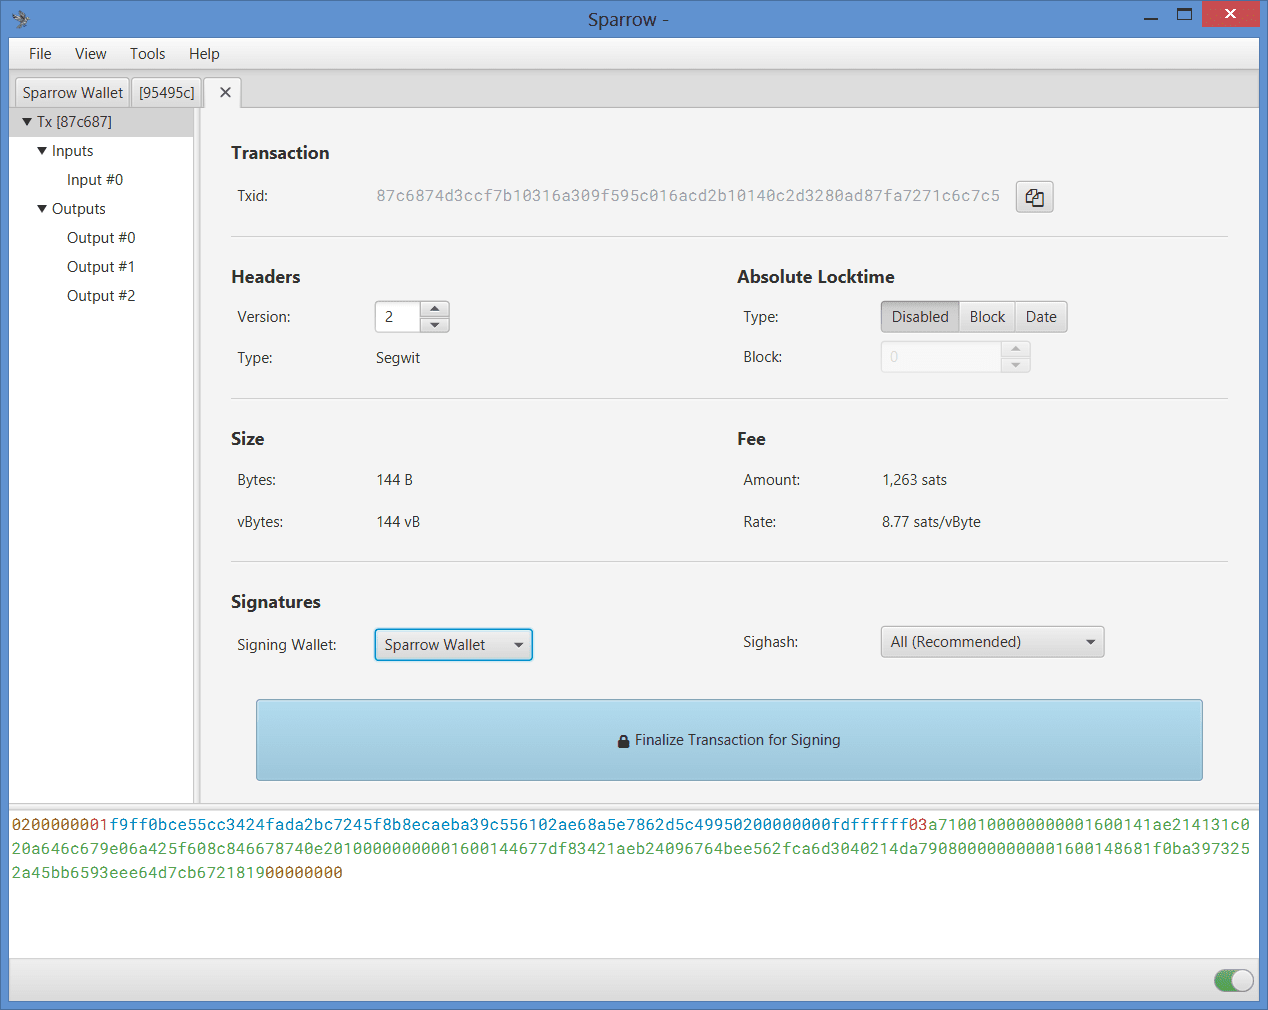
On the next screen, review the details. You can even add a transaction delay based on block height or date.
Once ready, select the “Finalize Transaction for Signing” button.
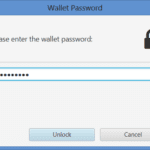
Then, select the “Sign” button and enter your wallet password, if you enabled this feature.
Once signed, the transaction is ready to be broadcast. Select the “Broadcast Transaction” button to send it to the Bitcoin network.
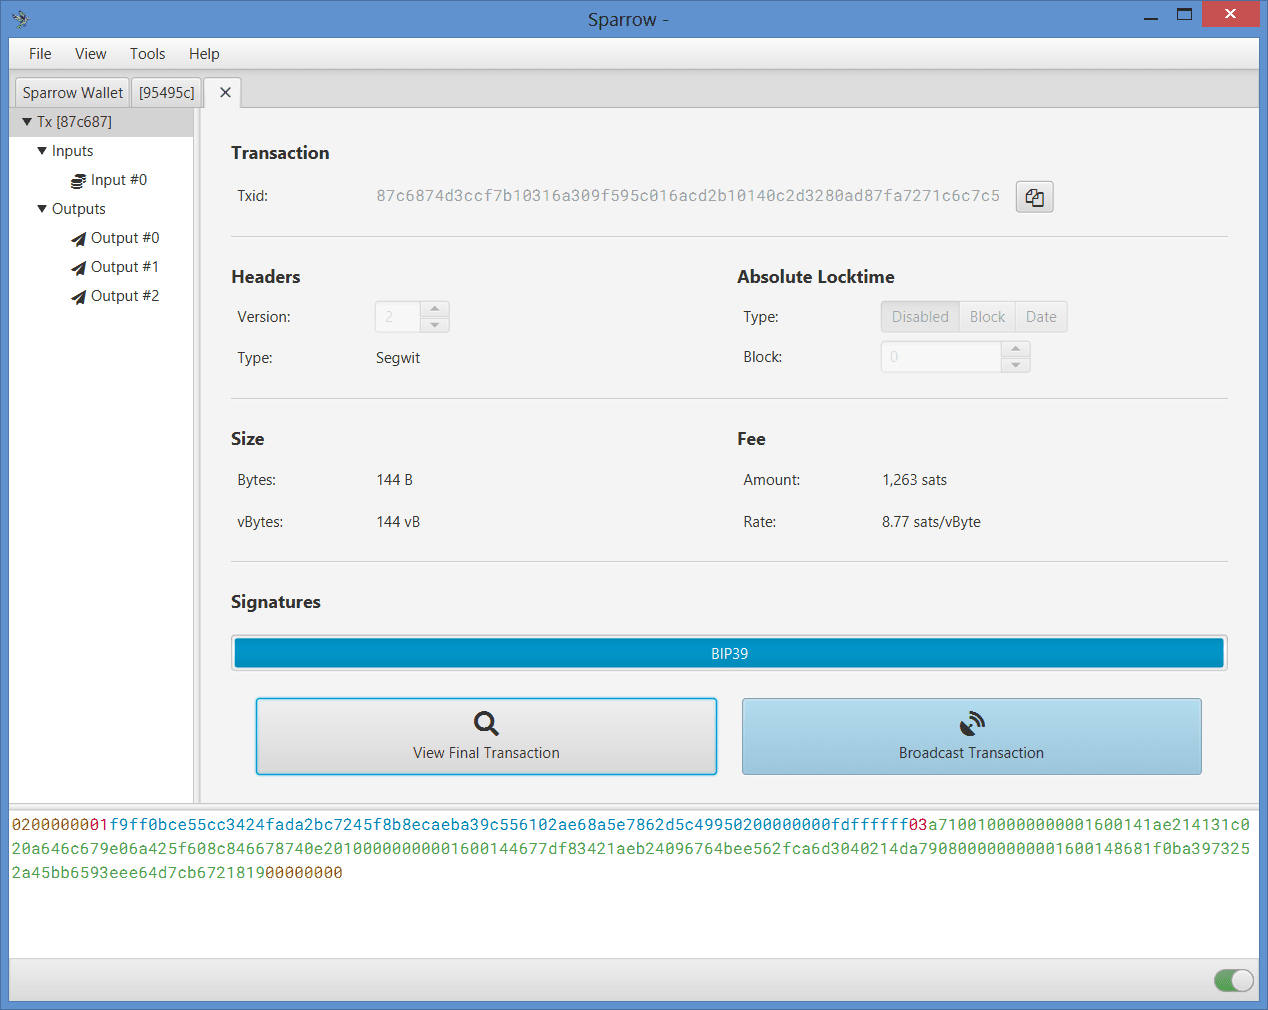
Once broadcast, your node will send the transaction to other nodes on the Bitcoin network until it gets pulled out of the mempool and mined into a block.
Conclusion
Sparrow Wallet is a beautifully-designed Bitcoin wallet packed full of features. This wallet supports single-sig or multi-sig, multiple address types, multiple node connection options, coin control, transaction labeling, built-in Tor and Testnet. Additionally, Sparrow Wallet supports partially-signed bitcoin transactions (PSBT).
With PSBT, you can import your hardware wallet xpub and use Sparrow Wallet as a watch-only wallet. This allows you to monitor the balance on your hardware wallet more conveniently as well as generate receiving addresses for your hardware wallet. Watch-only wallets cannot spend from your hardware wallet so your funds are always secure. When you want to spend from your hardware wallet, you can enter the watch-only wallet in your Sparrow Wallet application, construct the spend transaction and then export it as a PSBT. Then, you can load this PSBT into your hardware wallet via the MicroSD card option and sign the transaction with your hardware wallet’s private key.
Once signed, the transaction can be passed back to your Sparrow Wallet and broadcast to the network. Plus, it has an integrated blockchain explorer powered by your own node. There is too much to unpack in this article, but check out Sparrow Wallet’s full features page here.
There is a great best practices guide on Sparrow Wallet’s website here.
To learn more about Sparrow Wallet, jump in its Telegram group here.
To hear what’s up directly from the source, check out this episode of Citadel Dispatch by @matt_odell featuring Sparrow Wallet’s lead developer, @craigraw and yours truly, @econoalchemist.
https://www.youtube.com/watch?v=UKKYvllK33k
This is a guest post by Econoalchemist. Opinions expressed are entirely their own and do not necessarily reflect those of BTC Inc or Bitcoin Magazine.